Posts

InDesign Links

  InDesign Links Pen Tool https://www.youtube.com/watch?v=weg2Lyh__IE     This tool is mainly to draw things for your design.  You can draw any custom shape with this tool.  You create anchor points while drawing you shape or line.  Hold and drag to create curves.  You can right click on the pen tool to add anchor points that you forgot to add or want to modify you design.  You can select one anchor at a time and move it around.  You can add stroke and fill after you make you design with the pen tool.  This tool can be helpful when creating your own design.  It allows you to have freedom with what you want to draw and you can use your creativity. Working with Text https://www.youtube.com/watch?v=zq1ExDcGrDQ      This is the text tool.  You create a text box and can begin to type.  You can increase and decrease the size of the text.  You can change the font of the text you have typed.  You can skew ...

Somewhere

Image
 Somewhere Total time: 1 hour I decided to photoshop myself into the Cheaper By The Dozen family.  I got inspiration from the previous assignment we did.  I saw a bunch of girls in a photo and the artist photoshopped himself next to them.  I thought this was funny because it actually looked pretty real.  When I found this photo of the family it struck my imagination.  This family has a lot of kids so why not add one more.  They probably would not even notice.   When I created this, I used the quick selection tool to select myself out of my original photo which is below.  After selecting myself I feathered the edges and made it seem seamless.  Then I copied that layer and pasted it on the family photo.  I put the little boys leg over mine so it looked like my leg was behind him.  I made his shoulder go behind mine so it looked like I was apart of the family.  

Pre-Somewhere For Inspiration

Image
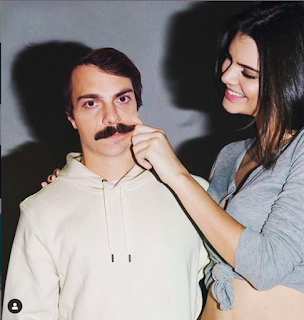
Pre-Somewhere For Inspiration #1 https://www.instagram.com/kirbyjenner/?hl=en I believe this photo would be hard to photoshop myself into because I would have to get the correct lighting and shadows to match the rest of the photo.  Kirby makes it seem so effortless.   #2 https://www.instagram.com/averagerob/ When I was looking through Average Rob's instagram posts I saw this photo and it reminded me of a movie with a lot of kids.  I was inspired by this photo for my project.  I want to photoshop myself into a cheaper by the dozen family picture.  I think it will be funny because they already have a lot of kids so why not add one more.   #3 https://www.boredpanda.com/funny-photoshop-troll-james-fridman/ I thought this photo was funny because James turned the whole man around and even covered the little girl.  I also thought it was funny that the artist didn't even remove the man in the striped shirt.   #4 https://www.boredpanda.com/r...

Autoscopy

Image
 Autoscopy Total time: 3 hours     My inspiration for this was the movie The Purge.  It is the end of October and I wanted to make something spooky and halloween sparked my imagination and I began creating this by using photoshop.  It was fun playing around with the filter gallery and making it all come together.  I also used the liquify tool which added a creepy feel to my creation.  I created two final products because I could not decide which one I liked better.  Overall I am very happy with my final result.   

BW to Color

Image
  BW to C o l o r Total time: 10 hours          This was one of my favorite creations I have made so far!  I used analogous, double split complementary and triad for my black and white to color photos.   I kept the pink in the middle consistent throughout all three images.   My favorite version is the analogous version.  It really demonstrates that my favorite colors are purple and pink.  Although this took several hours, it was worth the final product in the end.  I enjoy working with photoshop and I can't wait to use it in other projects.            I had to select each part of the photo and change the color.  I used the quick selection tool to select the part of my photo I wanted to modify.  Next, I went to image adjustments and changed the hue to the specific color in the palettes I was using.  I repeated these steps for the following photos....

Tag Brush

Image
       This is my tag brush that I created and I will be placing this in all of my projects from now on.  I created two different designs with my tag brush.  I really like the way my brush came out and it really represents me.  I hope to create more logos like this in the future and use them in my career.  The top logo is black and white.  The middle is a 3D effect and the bottom logo is a creative twist to match my style.  

Photoshop Links

Photoshop Links Background Eraser Tool  https://www.youtube.com/watch?v=0ve6JhrZBC4 In this video he describes the background eraser tool.  It is very effective when you are trying to cut out a photo with a lot of hair.  You must make a layer under the original photo.  Left click and hold on the eraser tool.  You can adjust the size of the brush to erase the background.  You can also experiment with the tolerance.  It will be more strict if you have a smaller number and most likely will not remove the original image.  This is also used to make a png.  I think this would be useful in a project to replace the backgrounds of the original photo and make it something different.   Dispersion Effect https://www.youtube.com/watch?v=xyBWcjIvn-o In this video it describes how to create the dispersion effect.  You have to cut out the model using the quick selection tool.  Then click on select and mask, in view mode choose black and r...